オープンソースライブラリである、Google のMediaPipeライブラリを使ってメディア内の顔検出、顔分析を行ってみます。
https://ai.google.dev/edge/mediapipe/solutions/guide?hl=en
目次
インストール
Google Colabにインストールします。
!pip install mediapipe顔検出
モデルを読み込みます。スマホのフロントカメラを想定したモデルや、背面カメラを想定したモデルがあるようです。
!wget -q -O detector.tflite -q https://storage.googleapis.com/mediapipe-models/face_detector/blaze_face_short_range/float16/1/blaze_face_short_range.tflite画像を指定します。
IMAGE_FILE = '/content/cancan01IMGL1213_TP_V4.jpg'分析を実行します。
import numpy as np
import mediapipe as mp
from mediapipe.tasks import python
from mediapipe.tasks.python import vision

# FaceDetector object.
base_options = python.BaseOptions(model_asset_path='detector.tflite')
options = vision.FaceDetectorOptions(base_options=base_options)
detector = vision.FaceDetector.create_from_options(options)

image = mp.Image.create_from_file(IMAGE_FILE)

detection_result = detector.detect(image)
print(detection_result)
分析対象とした画像はコチラです。
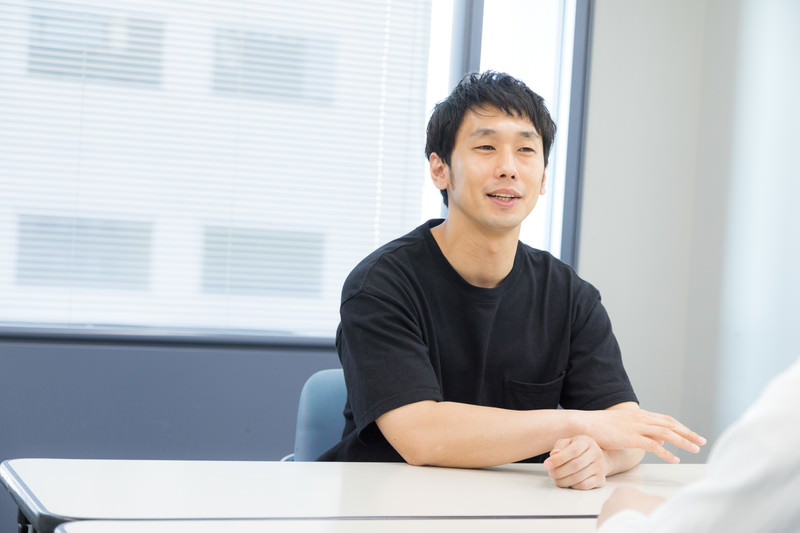
顔検出結果
DetectionResult(detections=[Detection(bounding_box=
BoundingBox(origin_x=450, origin_y=124, width=112, height=112), categories=[Category(index=0, score=0.8821994662284851, display_name=None, category_name=None)], keypoints=[
NormalizedKeypoint(x=0.6091421842575073, y=0.2920420169830322, label='', score=0.0), NormalizedKeypoint(x=0.6627865433692932, y=0.29013198614120483, label='', score=0.0), NormalizedKeypoint(x=0.6396880745887756, y=0.33883506059646606, label='', score=0.0), NormalizedKeypoint(x=0.6409043669700623, y=0.38231992721557617, label='', score=0.0), NormalizedKeypoint(x=0.5740575194358826, y=0.31769317388534546, label='', score=0.0), NormalizedKeypoint(x=0.6924066543579102, y=0.3101124167442322, label='', score=0.0)])])
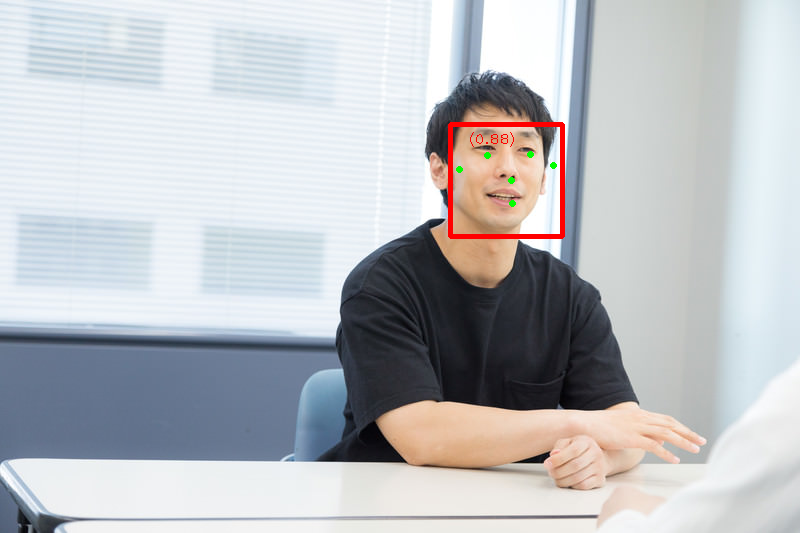
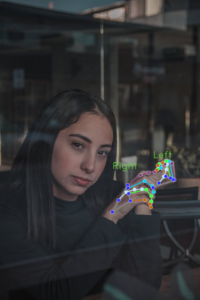
結果をプロット
結果をプロットすると以下のようになります。
顔分析
顔がどこにあるか、ではなく、顔のパーツなどの分析を行います。
まずはモデルをダウンロードします。
!wget -O face_landmarker_v2_with_blendshapes.task -q https://storage.googleapis.com/mediapipe-models/face_landmarker/face_landmarker/float16/1/face_landmarker.task分析します。先ほどと同じ画像を指定しています。
import mediapipe as mp
from mediapipe.tasks import python
from mediapipe.tasks.python import vision

base_options = python.BaseOptions(model_asset_path='face_landmarker_v2_with_blendshapes.task')
options = vision.FaceLandmarkerOptions(base_options=base_options,
                                       output_face_blendshapes=True,
                                       output_facial_transformation_matrixes=True,
                                       num_faces=1)
detector = vision.FaceLandmarker.create_from_options(options)

image = mp.Image.create_from_file("/content/cancan01IMGL1213_TP_V4.jpg")

detection_result = detector.detect(image)

print(detection_result)
顔分析結果
FaceLandmarkerResult(face_landmarks=[[NormalizedLandmark(x=0.6339576840400696, y=0.35530516505241394, z=-0.01578478142619133, visibility=0.0, presence=0.0), NormalizedLandmark(x=0.6373922824859619, y=0.325408399105072, z=-0.027175134047865868, visibility=0.0, presence=0.0), NormalizedLandmark(x=0.6349084973335266, y=0.335887610912323, z=-0.015140530653297901, visibility=0.0, presence=0.0),

~~~ 長いので省略 ~~~
結果をプロット
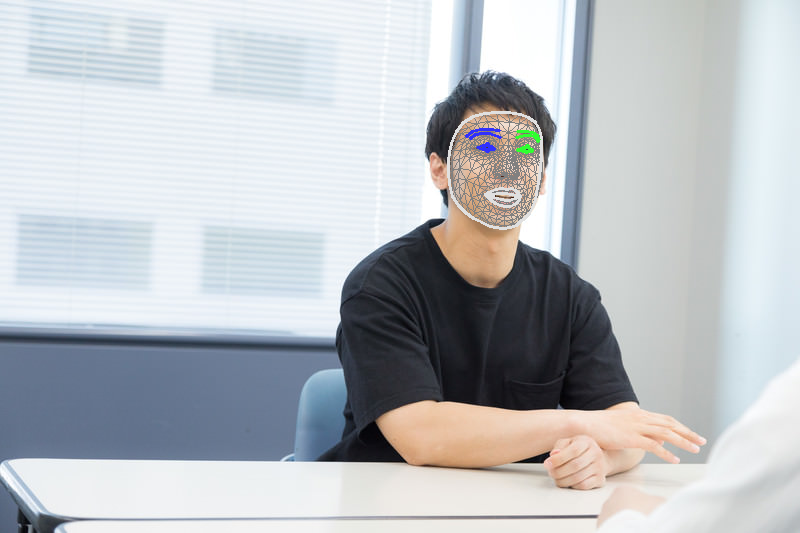
顔の分析まで出来ました。
例えばですが、このような分析結果をベースに顔DBを作成し、簡単な顔検索システムや顔認証システムが出来るかも知れませんね。
Google MediaPipeを使った手の検出と分析はコチラ
あわせて読みたい

オープンソースでハンドトラッキング
ハンドトラッキングは、カメラやセンサーを使用して、手の位置、動き、形状を検出・追跡する技術です。手の動きを即時に検出してシステムを操作するリアルタイム処理だ...